


How to record screen on Windows 10 with audio? The easiest way to do this task is to record the screen with a free and high-performance screen recorder.
Recording your PC screen is the best way to capture gameplays, save online lectures, download protected videos from streaming platforms, and create videos on your computer. When most people think about screen recording on Windows 10 for the first time, they search for a built-in recorder and quickly open Xbox Game Bar. They open the app only to get disappointed by its performance and limited features. Although the Xbox Game Bar can record screen on your PC, it only gives you a limited recording time, no editing features, and no external audio recorder.
iTop Screen Recorder (The One-stop Solution)
After trying the built-in recorder, everyone thinks about how to record screen with audio using a free third-party tool. This is where the iTop Screen Recorder steps in. It is a free screen recorder with all the features that you wish to find in professional software focused on recording your PC activity with a low CPU usage requirement. The iTop Screen Recorder offers features like webcam screen recording, flexible capture, video editor, special effects, internal and external recording, and free-of-cost services. Here is how to record screen on Windows 10 using the iTop Screen Recorder.
How-to Guide
STEP 1: Visit the official iTop website to download their screen recorder for free. Install the software and open the activity you want to record. Now, open the iTop Screen Recorder.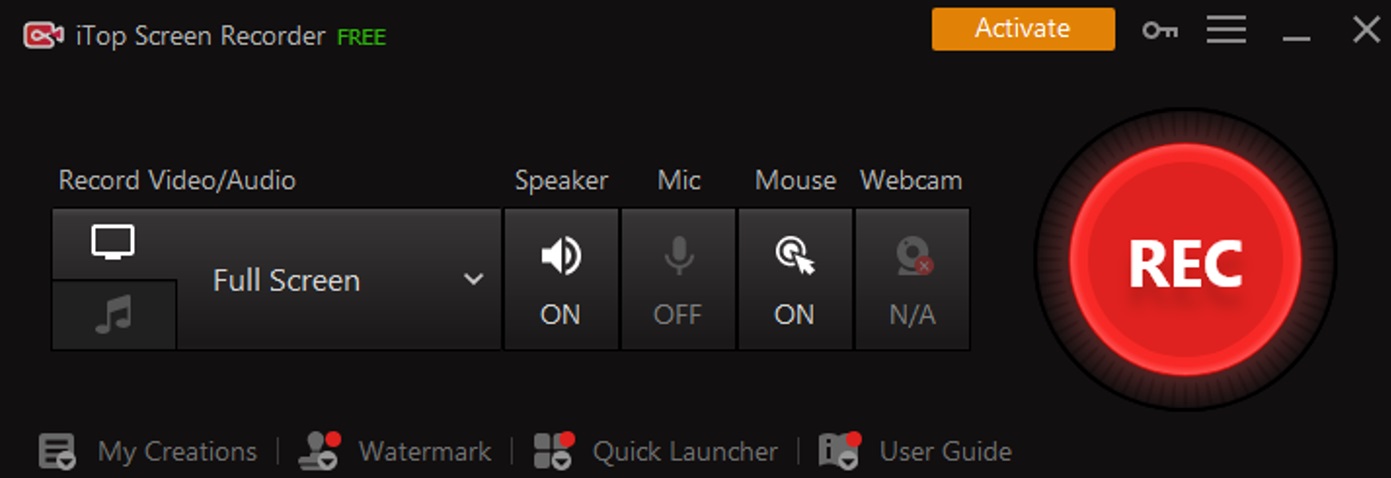
STEP 2: First, set your record screen preferences. You can choose to have internal, external, or both audios simultaneously in your recording. You can also set the capture size, add watermarks, or set the video quality. After you finish the settings, click on the red “REC” button to begin.
STEP 3: After you record the desired activity with audio, go to “My Creations” to preview it. Here you can edit your video without using another video editor. You can cut, trim, merge, and compress your recording. You can also add special effects and do lots of cool stuff. After you are done with editing, you can export it in any format you want.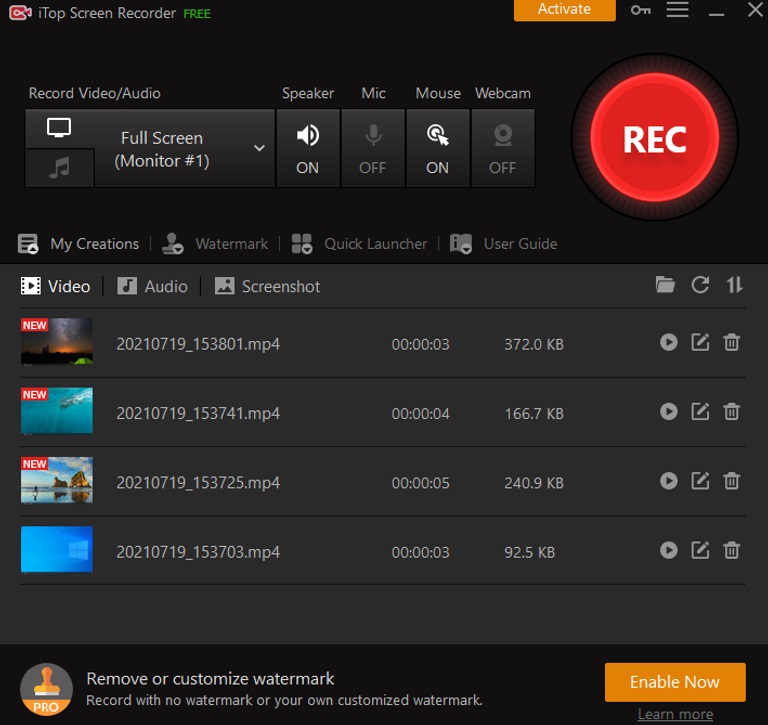
Use the OBS Studio
You can also use OBS studio to record your PC screen if you are familiar with the product, and you can work your way around a professional-grade screen recorder. OBS Studio is a free screen recorder with all features that you might need, but it is not easy to use. If you are not tech-savvy, using OBS studio for the first time can be hard for you. Here is how to record screen with audio using OBS studio.
STEP 1: Download OBS studio on your computer and open whatever you want to record. Select “Display Capture” from the “Source” window and choose a preview from the “Properties” window.
STEP 2: Now, set the audio capture settings by opening the “Source” window and selecting “Audio Input Capture.” You can customize all the preferences for your recording, so take your time before you start.
STEP 3: Hit the “Start Recording” option on the right when you are ready. You can also find the stop button there to finish your recording. The recorded video will go to your PC’s “Video” folder.


